|
|
|
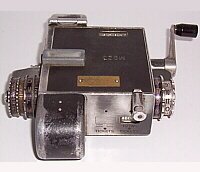
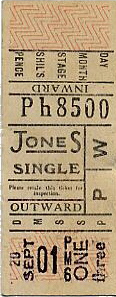
| Insert Setright
MB23 (Serial 13782). |
 |
| Moore
Bros / Eastern National (£.s.d.). |
|
| This machine was
new to Moore Brothers of Kelvedon in
Essex in 1952 and transferred to Eastern
National when the routes were sold in
1963. |
|
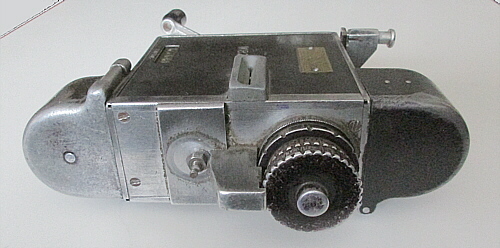
| The predecessor
of the Setright Speed was the insert
model, sold from the 1930s to the 1950s.
The date, price (in shillings and pence)
and fare stage are set by turning the
dials. |
|
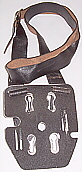
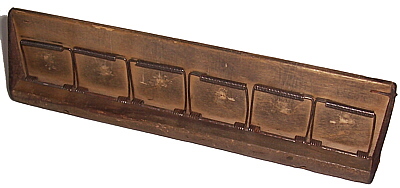
| The correct type
of ticket is selected from a wooden
rack, it is placed in the slot and the
handle is turned. The amount is recorded
on the machine. |
|
|
|
|
|
|
|
|
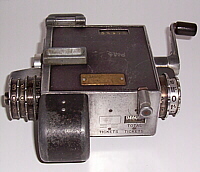
| Insert Setright
PM6 (Serial 6559). |
|
| Western SMT (£.s.d.).
|
|
| This machine was
new to the Scottish company Western
SMT in 1948. |
|
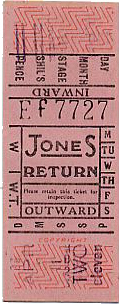
| Both of these machines
show the price in words on the ticket. |
|
| The amount of money
collected is registered on two counters,
one for shillings and one for pence.
There is also a total ticket register. |
|
| A punch is attached
to clip tickets. |
|
|
|
|
|
|
|
| |
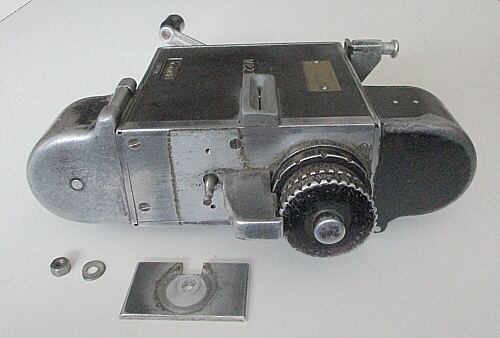
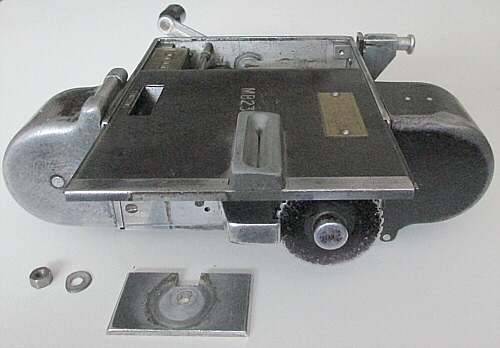
| Opening an Insert Setright |
|
| Before starting, be aware that
this will probably result in ink getting onto your
hands, clothes, the machine, tools and the work
surface. Please choose a location where this is
acceptable. |
|
|
|
|
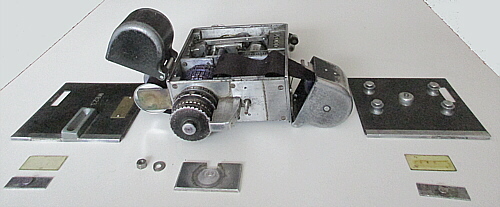
On the opposite
side to the handle there is a nut.
This may be covered by a lead seal, in which
case the seal will need to be removed. |
|
|
|
|
|
Remove the
nut, there may also be a washer.
This will release the metal plate directly
underneath.
The plate can now be slid up and off. |
|
|
|
|
|
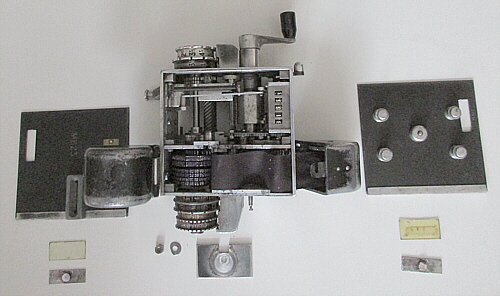
The main
front plate can now be removed by sliding
it towards that side of the machine. Remove
the perspex cover over the shillings counter
as this will fall off.
There should be a rectangular metal plate
protruding above the ink ribbon. This covers
a clip which holds the cover over the end
of the ribbon. Press down on this plate and
slide it towards the interior of the machine.
It should now be free to remove it completely.
Press down on the clip and pull the cover
open. |
|
|
|
|
|
Turn the
machine over and slide out the backplate.
Again, remove the perspex cover over the counter.
Remove the plate over the clip and open the
other cover This gives access to the entire
ribbon.
The ribbon can now be rewound or replaced.
|
|
|
|
|
|
To close
the machine, close the ribbon cover by depressing
the clip and sliding it under the edge of
the machine. Now return the plate over the
clip to hold it in place. Note the round protusion
on the underside of the plate. This slots
into the clip.
Make sure that the perspex cover over the
counter is in place. It fits into a groove
on one end. Slide in the main cover taking
care to fit the front and back to the correct
sides. This can be a bit fiddly as the metal
plate over the clip needs to be pressed down
quite hard at the same time so that the groove
for the cover is clear.
The panel marked shillings with the slot goes
on the side with the punch. Repeat for the
other side. Replace the metal plate, the washer
(if any) and the nut. |
|
|
| Ink ribbons are hard to find.
Fortunately, they can be rewound several times.
If you decide to re-ink the ribbon, do not use a
water-based ink. |
|
| I haven't been able to find
replacement ribbons recently nor a suitable ink
for re-inking an old one. Water based inks may damage
the mechanism and should not be used. Re-inking
is a messy business but is likely the only alternative. |
|
|
|